"Engage in a classic Marvel encounter!"
— Heroic Battle
"Heroic Battles are unique fights showcasing specific heroes and villains.
Recruit all heroes involved to meet the challenge. Chance to get great rewards!"
— S.H.I.E.L.D. Intel
A Heroic Battle is a type of encounter involving a story-based battle with specific Heroes. The Agent does not fight with the heroes in this combat, marking the first time that the Agent is not used in combat. Heroic Battles was introduced alongside Incursion on Story: Season 2.
Heroic Battles can be found as an orange version of the Team page's Icon on the current Mission's Map. It costs 10 Energy to start a Heroic Battle. Players cannot initiate a Heroic Battle without having the required hero or heroes recruited. Heroic Battles are said to be challenging for low-level Heroes, as certain Hero Abilities help greatly in succeeding throughout the battle.
Heroic Battles have special dialogues with the involved characters before and after a combat. Combats in Heroic Battles have unique differing mechanics and some Heroic Battles grant new and old exclusive Passive Effects for the characters. As Heroic Battles do not have the Agent in any of the fights, Heroes in this battle do not have access to the Agent's Inventory and Distress Calls. Heroic Battles are not necessarily required to be finished in order to unlock the Epic Boss battle in the Mission, but can be used to finish Deploy Missions faster.
Liste Des Récompenses[]
If players are successful from a Heroic Battle, players have a chance to get a reward in the form of a roulette. The rewards range from random consumable Supplies, Isotope-8, Character Restricted Empowered iso and Command Points. There are also chances for specific Gears, from Random Deploy Gear to Limited Edition Spec Ops Gear.
- 1 / 3 / 5 / 10
 Points de Commandement
 - Random Isotope-8 (Tier and kind of Iso-8 depends on the Agent's Level)
- Random Store and Premium Supplies (Tier and kind of Supply depends on the Agent's Level)
- Challenge Points
- Random Deploy Gear (Gear depends on the Agent's Level)
- ISO-8 Renforcé Uniquement Personnage
Liste Des Batailles Héroïques[]
So far, there have been at least one Heroic Battle encounter per Mission since Season 2, Chapitre 1 - Excalibur. There is also a Heroic Battle released for Season 1, Chapter 2 - The Iso Effect.
Opérations Spéciales - Fugitifs
| ||||||||||||||||||

| |||||||||
Très simple. Si vous pouvez, isotez là en Chaotique. Vous avez son Iso perso? Très bien. Un "gros et rapide" lui va bien aussi. Donc, L6. Puis L6, L1, L2. Punisher revient à la vie, alors on refait L1 puis L2 et on spam L2 si nécessaire. Fin du combat.
This battle can be dangerous if not played correctly: buff especially Molly's health and Defense, stamina too if you can; about EISO, the best ones to equip are Recovering and Close.
Punisher will start the fight with a passive buff named Modèle:EI-Kid Gloves Kid Gloves, which will make him use only non-damage grenade-like attackslike Smoke Grenade or Nerve Gas. It is useless to damage him during this turn, since when Punisher is below 50% of max Health, a dialogue will trigger, he will lose Kid Gloves, restore his health to full, and he'll start attacking Molly with his various weapons (without changing class): use Molly's Raspberry instead, and after the dialogue use Temper Tantrum, unleashing a huge load of attacks (alternate Drop Kick and Wind-Up Punch) that will sure damage him a lot, if not defeating him. Note that Molly's fourth attack, Let's Play Catch!, is locked.
One way to debuff Punisher from his Modèle:EI-Kid Gloves Kid Gloves is to throw his van at his head as your very first move (it's available at that time), this will insta kill him and trigger his dialogue that starts the real fight.
After Punisher goes below 50% of max Health again, he regenerates at full Health and will always use Battle Van: be sure to not have too low health when this happens, and the player will end the fight victorious. Note that, after Punisher uses Battle Van, Molly's Let's Play Catch! is unlocked, allowing her to end the fight in a funny way, getting an Epic Overkill, otherwise normal defeat.
| ||||||||||||||||||
| ||||||||||||||
Un dommage collatéral et un Ionisant sur la L1 sont utiles mais pas obligatoires. On fait la L1 de suite sur Groot. Puis on se met le bouclier avant de balancer la L9 (normalement, on a les 5 énergies divines à ce moment là). Reste théoriquement plus que la bouture. Donc on la déracine et le tour est joué.
If possible, socket the Recovering Empowered Iso-8 to stay alive.
This battle isn't hard to get, you can't attack Rocket without taking Groot down (except by spamming L9 and praying for a lot of chance on crits). Apply your shield/L2 whenever it's up. Use L1 on Groot when your L2 is on cooldown.
Rocket has energy attacks that will trigger your passive and grant your stacks for your L9, as well as recover your stamina. These attacks also have a chance to restore your health.
The main idea is to attack with L9 once Groot is in his cutting form to kill him for good and finish off Rocket easily after
Some luck is required to proc the HP recovery from her passive and lock out the right moves from her L1's Reduced Potential.
| ||||||||||||||||||
| |||||||||
Bon bah rien de bien compliqué. L9 et on joue à Robin des bois avec la L1. Si tout se passe bien, Bullseye ne pourra même pas jouer
This fight is pretty difficult, and it will require to ISO Hawkeye's health and Attack a lot. Equip the Styptic Empowered Iso-8 if you have it; as always, Hawkeye's Tactician Heroic Age outfit is strongly recommended (beside Infiltrator Avengers Hawkeye can do a great work).
Bullseye will often attack you with Knife Toss, which deals Modèle:EI-Easy Target Easy Target and then making Evasion useless, and Knife Barrage, which can deal Modèle:EI-Bleeding Bleeding if used as a counterattack: since Bullseye can preemptive counter your ranged attacks, and Hawkeye relies on follow-ups, this could kill you by simply bleeding. Always begin with Pinpoint Target and Trick Arrow (Bullseye can be stunned): if you're lucky and you buffed Hawkeye's Attack, you'll do enough follow-ups to severly damage your rival.
After the first round, a dialogue will trigger and Hawkeye will gain the Modèle:EI-Nocked and Loaded Nocked and Loaded passive. This will make the battle much easier, since your counters too can follow-up if Bullseye has Modèle:EI-Pinpoint Target Pinpoint Target, but it will put you in trouble if you are bleeding. If you don't have the Styptic EISO, equip the Recovering Empowered Iso-8 and Recharge until Bleeding expires (Knife Barrage only deals Bleeding when used as a counterattack).Chapitre 2 - L'Effet Iso
| ||||||||||||||||||
| ||||||||||||||||||||||||||||||
Stratégie wiki :
Afin de réussir ce combat, il est indispensable que Fandal soit au moins lvl 2 et Hogun au lvl6. Dans ce combat, Heimdall commence toujours les 2 premiers tours, dans lesquels il utilise le Gjallerhorn et la lame d'Uru. Après cela, les 3 héros vont prendre leurs tours : Fandral et Volstagg utilisent leurs l2 respectives pendant qu'hogun utilisera son élixir, afin de faire boire les deux autres et d'enlever leurs débuffs posés par Heimdall. Sif et Thor joueront alors leurs tours, Thor utlisera son inspiration de bravoure et sa l9, ce qui garantit à Fandral un tour supplémentaire. Il pourra alors utiliser sa L1 sur Heimdall pour lui enlever des buffs grâce à l'effet « points de pression » et donc diminuer les dommages de Hofund. Continuer à suivre cette méthode pour finir la vague 1, surtout en utilisant au maximum les L2 de Fandral et Volstagg dès que possible. Sur la seconde vague, les adversaires seront Loki, suivi de l'enchanteresse et de l'executionneur. Assurez-vous d'avoir « en garde ! » de Fandral activé au changement de vague, surtout à cause des debuffs infligés par les adversaires (en particulier Loki appliquant désorienté). Dans tous les cas, continuez à suivre la stratégie de la vague 1 (Hogun buvant son élixir dès que possible) et la bataille devrait facilement être gagnée…
Stratégie forum :
Tour 1: Fandrall : L1 sur Thor puis L2 Volstagg : L2 Hogun : L6 Tour 2 : On achève les blessés en gardant la L2 de Hogun sous le coude autant que possible.
Deuxième vague: L2 d'Hogun dès que possible L6 à suivre si besoin (malus HP bas etc...) sinon on cible l'Enchanteresse véritable fléau de cet vague d'ennemi. Une fois Amora morte le reste va assez vite mais surtout tuez la vite c'est la plus dangereuse.
In order to have a chance of winning this battle, Fandral should be minimum at level 2, and Hogun at level 6.
In this battle, Heimdall will always get the first two turns, in which he'll use Gyallarhorn and Uru Blade. After that, all of the Warriors' Three will take their turns: Fandral and Volstagg should use their L2 (respectively, En Garde! and Guard the Rear), while Hogun should use the Elixir of Recovery to make all of the heroes drink and remove the various dangerous debuffs (Modèle:EI-Wide-Open Wide-Open, Modèle:EI-Tenderized Tenderized and Modèle:EI-Staggered Staggered) dealt by Heimdall. (Modern Armor) Sif and (Avengers) Thor will then get their turns: Thor will use Inspire Bravery and Summon Thunder, granting Fandral an extra turn, in which he should use his L1 (Have at Thee) on Heimdall to remove some of his buffs (and lowering damage of his Hofund) thanks to the Modèle:EI-Pressure Points Pressure Points effect. Keep fighting following this pattern, especially using Fandral's and Volstagg's L2 every possible time, and the first wave will be defeated.
On the second wave, the Warriors' Three enemy should be Sif again... but actually it's Loki, followed by the Enchantress and the Executioner. Be sure to have Fandral's Modèle:EI-En Garde! En Garde! active when the wave skips, since the three enemies can deal a lot of nasty debuffs (especially Loki, which will apply Modèle:EI-Disoriented Disoriented with his Hall of Mirrors), so having Fandral's Modèle:EI-Depower Depower them will probably ensure the victory. Anyway, be sure to follow the previous wave's fighting strategy, making Hogun drink the Elixir of Recovery whenever possible, and the battle will be easily completed.
| ||||||||||||||||||

Stratégie wiki :
Dans ce combat, Malicia sera capable d’absorber plusieurs classes si les sentinelles ont utilisé leur transfert de classe. Ce combat sera facile si Gambit est au moins lvl9 : utiliser ce pouvoir permet d'enlever les buffs des sentinelles et de poser des débuffs utiles qui rendront les coup de Malicia encore plus meurtriers. Sinon, accumulez un max de charges cinétiques, puis lâchez son action qui diminuera la défense des sentinelles ce qui permettra à Malicia de faire encore plus de dommages.
Stratégie forum :
Assurez-vous que Malicia joue ce combo exact: Tour 1 : Confort du Sud (pour gagner la Vitesse Kree) Tour 2 : - Rixe - Absorbtion d'Essence Tour 3+: Répéter
Ce combo s'assure que Malicia a toujours ses PV et endurance au max. Gambit et Malicia doivent attaquer la même sentinelle au début, pour vous assurer que le fin du match soit Malicia contre une seule.
En effet, une sentinelle seule ne peut blesser Malicia plus qu'elle ne se soigne, donc même si votre Gambit meurt (et soyons honnête, c'est plus que probable, et pas très grave), une fois que Malicia est seule face a une sentinelle, le combat est gagné d'avance.
This is the first and earliest Heroic Battle that can be encountered by players in the game. Prior to the October 15, 2013 update, Prime Sentinels in this battle never changed to other classes using their abilities, rendering Rogue's Modèle:EI-Absorb Class Absorb Class only obtaining Modèle:EI-Ubiquitous Power Ubiquitous Power in this fight. Since the update, they now change their class during their first turn, allowing Rogue more versatility; thanks to her battle-exclusive passive buff Modèle:EI-Rogue Protocol Rogue Protocol, Rogue is also able to absorb more than one class power, if the Sentinel she is using Absorb Power on has had the other Sentinel transfer it's class bonus.
The battle is actually pretty easy, if Gambit is at least at level 9: using Royal Flush will in fact remove the Sentinels' buffs and deal the useful Modèle:EI-Wide-Open Wide-Open and Modèle:EI-Fumbling Fumbling, which will make Rogue more lethal. If not, Gambit should accumulate as many stacks of Modèle:EI-Kinetic Charge Kinetic Charge possible, and use Ace of Spades to lower their defense, allowing Rogue to deal more damage.
| ||||||||||||||||||

| ||||||||||||||||||||||||||||
Stratégie wiki :
Dans ce combat, si vous descendez la vie de DDS en-dessous de 50 %, cela mettra fin à la vague en cours et vous passerez à la vague suivante. DDS ne pourra être complètement battu qu'à la vague 3. Ce combat n'est pas très difficile du fait que les dégâts infligés par DDS ne sont pas très élevés et que la régénération de wolvie est plus que suffisante pour le garder en vie. La meilleure chose à faire est de garder le maximum de saignements possible sur DDS, surtout quand ce dernier gagne la capacité de régénération dans la vague 2. La vague 3 est la plus difficile, mais wolvie contre-attaque de plus en plus dès que sa santé baisse. Il tuera alors DDS sans difficulté.
Stratégie forum :
Wolverine est plus délicat. Je conseille d'immobiliser Sabertooth, surtout dans la deuxième et troisième vague. Sinon, sa tenue marron et beige permet d'aider avec ses contre attaques, et surtout, dès que vous pouvez, faites saigner votre adversaire, puis lancez l'exploitation de saignement de Wolvie, et vous devriez gérer.
Un moyen de s'assurer qu'on est en bonne voie, est d'avoir plus d'un tiers d'endurance et deux tiers de vie à la vague 2, et plus d'un tiers de vie à la vague 3.
This Heroic Battle is unique in that damaging Sabretooth for at least 50% of his health will end the wave and begin the next with a different combat background. Sabretooth cannot be completely defeated in the first two waves and can only be defeated at the third and final Wave; aside from the combat background changes, Wolverine gains Modèle:EI-Feral Instinct Feral Instinct whenever he defeats Sabretooth in a wave, stacking for up to two times. Sabretooth gains Modèle:EI-Healing Factor Healing Factor in the second wave, and then gains Modèle:EI-Frenzy Frenzy at the final wave, similar to what his passive effects were on Chapter 4 - Mission 6 of Season 1.
| ||||||||||||||||||

Stratégie wiki :
Dans ce combat, Mystique peut copier des personnages et utiliser leurs capacités : lorsqu'elle se transforme en Cyclope, ses attaques exploitent les faiblesses. En Wolvie, elle utilisera les L1 et L2. En fauve elle utilisera indifféremment L1 ou L9, et quand elle se transforme en Emma Frost, elle utilisera « diamant de guerre ». La meilleure stratégie ici est de faire souvent « embuscade » qui pose et exploite les combos, avec 60 % de chance de faire une attaque suivie. Utilisez « coup de pied » à chaque fois que possible pour immobiliser. Utiliser le costume broyeur offre un réel avantage. Le combat ne posera pas de problèmes, sauf si elle pose la L1 de wolvie, ce qui provoquera deux saignements et ravagé.
Stratégie forum :
Surement un des combats les plus simples.
Si vous avez la tenue spadassin, déjà vous êtes surs de gagner. Commencez par sa quatrième attaque, pour faire saigner Mystique, puis après, vous pouvez l'immobiliser, ou même lancer son attaque lancant une seconde attaque sur les persos affaiblis, mais pourquoi s'embêter, quand une simple utilisation massive d'embuscade fait l'affaire ?For the first time in the game, Mystique can now copy other characters using her Shapeshift ability. In this battle she can Shapeshift to Cyclops and attack using Exploit Weakness, can shapeshift into Wolverine and attack using Deadly Claws and Savage Rend, can shapeshift into Beast and attack using The Jungle and A Farewell to Arms, and shapeshift into Emma Frost and attack using War Diamond. The best strategy is to spam Ambush, as it deals and exploits Modèle:EI-Combo Setup Combo Setup with a 60% chance to follow-up, using Night Kick every time it's possible to stun the enemy; obviously, Nightcrawler's Scrapper Swashbuckler outfit will give him a great advantage. The battle won't be a problem anyway, unless Mystica's Deadly Claws hit Nightcrawler, dealing him two stacks of Modèle:EI-Bleeding Bleeding with Modèle:EI-Ravaged Ravaged.
| ||||||||||||||||||

| |||||||||||||||||||
Stratégie wiki :
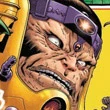
Dans ce combat, Spider-woman pourra manipuler les ennemis pour qu'ils la protègent et la guérisse, grâce aux phéromones de peur et de séduction. Le passif de M.O.D.O.K le rend vulnérable aux attaques bio-électriques : l'attaque de venin de SW stoppera le compte à rebours de M.O.D.O.K, le forçant à perdre un tour pour faire un reset à 3. La première action à faire est de mettre l'hormone de séduction sur M.O.D.O.K, puis celle de peur sur tous les ennemis. Après ça, faites en boucle l'attaque au venin en gardant les biologistes en vie tout du moins tant que les contre-attaque le permettent… Si vous avez Kuurth, l'attaque « Aime-moi » vous garantit la victoire en laissant M.O.D.O.K tuer ses acolytes puis terminer à coups de marteau.
Stratégie forum :
Encore une fois, un motif répétitif. Le premier tour, tout de suite lancer Phéromones de peur, puis Jet de Venin sur MODOK à chaque tour, jusqu'à la fin du rechargement de Phéromones de peur, et dans ce cas le relancer. NE LANCEZ PAS Vengeance.
Quand vous lancer Phéromones de peur, ou que vous faites un rechargement, MODOK vous attaquera, mais vous vous soignerez donc...N'ayez pas peur d'attaquer si vous êtes affecté par une angoisse mentale, de toutes façon les sous fifres vous soigneront. Une fois MODOK mort, lancez Vengeance, puis directement Phéromones de peur, et ils se suicideront tout seuls.
Extremely difficult before Spider-Woman's update, this heroic battle is now pretty medium difficult. Due to the Bioethicist's Modèle:EI-Budget Airfilters Budget Airfilters, Spider-Woman can manipulate these enemies into healing and protecting her by using Fear Pheromones or Seduction Pheromones; M.O.D.O.K. also has a new Heroic Battle-exclusive passive effect called Modèle:EI-Organic Machine Interface Organic Machine Interface that makes him vulnerable to bio-electric attacks. Because of this, Spider-Woman can use her Venom Blast in order for M.O.D.O.K. to stop his Doomsday Clock Countdown and force him to waste a turn into resetting his countdown back to Modèle:EI-Doomsday Clock: 3 Doomsday Clock: 3. The first action to do should be using Seduction Pheromones on M.O.D.O.K., then Fear Pheromones on all enemies and after that spamming Venom Blast on the main boss, letting the Bioethicists alive (as long as Spider-Woman's Modèle:EI-Vengeance Vengeance passive counterattack will allow this) to have a free "healing source" when needed.
If you have Kuurth, it's best to use the scrapper form for obvious reasons. Kuurth is immune to Bio and Psychic attacks, so she can simply ignore half of the attacks M.O.D.O.K. and his minions use. This gives her the freedom to be more aggressive offensively. She can use Love Me on M.O.D.O.K., then let him fight his own minions while she prepares to smash him with her hammer.
| ||||||||||||||||||

| |||||||||
Stratégie wiki :
Ce combat est rendu très facile grâce au passif des deux combattants qui applique « frappe-moi » dès que l'un des deux se repose ou recharge. La seule chose à faire attention, c'est d'avoir suffisamment d'endurance au moment où Thor rechargera et tout ira bien.
Stratégie forum :
simplissime: Tour 1 : Don du combattant Tour 2 : Colonne abattue, l'ennemi est immobilisé, utilisez l'attaque que Hercules n'a pas utilisé en contre au tour précédent
Tour 3+: Vous avez gagné Bénédiction de l'Olympe, donc frappez avec Martèlement de pancrace jusqu'à la victoire.
This battle marks the second time Thor becomes an enemy, and the first in Story Mission to battle against a Hero (not counting the Villains turned Heroes).
This is an easy Heroic Battle. The battle begins with a Heroic Battle-exclusive Passive called Modèle:EI-Tough God Tough God applied to both Hercules and Thor that applies Modèle:EI-Hit Me! Hit Me! to the character that Rests or Recharges, that eventually leads into granting Modèle:EI-Unsporting Unsporting to the character that does a non-offensive action while their enemy has Hit Me! in effect. The battle may require proper timing on the use of abilities, including Recharge, in order to succeed: simply be sure to not be out of Stamina when Thor recharges, and it'll be fine.
| ||||||||||||||||||

| ||||||||||||||||||||||||||||||
Stratégie wiki :
Cable doit absolument être lvl 9 minimum pour réussir cette mission. Peut importe le lvl pour Deadpool. La première vague ne pose aucun problème du fait de la très faible puissance d'Ironclad, malgré les 2xfurieux qui prend en frappant deadpool. La seconde vague commence avec les U-Foes restants et surtout un changement de côté de Deadpool qui va prendre la place de Vector. De fait, on se retrouve seul avec Cable face à X-ray, Vapor et Deadpool. Deadpool garde ses passifs, mais prend la classe de Vector, soit tacticien, ainsi que sa place dans l'ordre du tour de jeu. Il gagne également un nouveau passif, spéciall combat héroïque, qui protège Cable et Vapor des attaque uniques. Malheureusement, Deadpool attaque toujours Cable et le tue en quelques tours avec un bon enchaînement. De fait, ce combat devient un problème de temps et de stratégie… Si tu tues Deadpool en premier, tu seras complètement à la merci de X-Ray et Vapor, Et si tu les tues en premier, le passif de Deadpool te tuera. Commencer par prendre un tour supplémentaire (L9) puis art des Askanis sur Deadpool et ensuite switch en overdrive pour l'attaquer avec le déchaînement techno-organique qui suivra par des piques psioniques. (Vapor et X-ray vous aideront à attaquer Deadpool). Au second tour, switch en control pour frapper x2 au fusil à plasma sur deadpool (grâce à l'entouré) ce qui le tuera. Terminez les deux autres avec l'attaque dématérialisée ou la frappe télékinésique.
Stratégie forum :
Beaucoup trop de facteurs en jeu dans ce niveau, donc voila juste quelques astuces.
La première vague se termine rapidement, alors tentez de baisser l'endurance de Cable, jusqu'à être à deux doigts de passer psy, puis butez le cogneur, comme ça la vague 2, vous passez en attaques psy, et dégommez X-Ray, qui est immunisé contre vos attaques physiques. Ensuite, ignorez deadpool, car ce dernier ne fera que bloquer vos attaques et se donner des buffs inutiles. Tentez les attaques de zone, et surtout, assurez-vous que Cable aie les meilleurs ISO possibles.
Note: Cable should at least be at level 9 to have a chance to win this battle. It doesn't matter Deadpool's level.
The battle begins with Ironclad as the first wave. Ironclad will use Punch twice on Deadpool. The enemy is considerably weak compared to his other appearances: despite having two stacks of Modèle:EI-Enraged Enraged, he can be defeated in under a few hits by either Cable or Deadpool.
The next wave with the remaining U-Foes members starts with a twist, as Deadpool begins the round using Redesign Encounter. This turns him into the opposing side and replaces Vector in battle, but retaining Vector's turn order icon, his Tactician class, and Deadpool's Passive effects, along with gaining a new Heroic Battle-exclusive effect called Modèle:EI-Lover-boy Lover-boy in which he protects Cable and Vapor from all single target attacks. Unfortunately, Deadpool will attack Cable in each of his turns... and with the correct attack sequence, which will sure kill Cable in a few turns.
This battle will then be a matter of time and strategy: if you kill Deadpool first you'll be open against X-Ray and Vapor attacks; if you kill them first, the Merc-With-A-Mouth will ravage you. Start giving yourself an extra turn with Temporal Shift, then use Askani Arts on Deadpool: switch then to Overdrive mode and attack him with Techno-Organic Rampage, which will be followed by Psionic Spikes (note that Vapor and X-Ray will "help" you killing Deadpool). On the second turn, switch to Control mode and attack the Merc with a double Plasma Rifle (thanks to the Askani Arts' Modèle:EI-Flanked Flanked effect), which will probably kill him: focus your attention then on the other two enemies, using Temporal Shift whenever possible, to easily win the fight. If you want, you could try using Telekinetic Slam to Modèle:EI-Stun Stun the enemy party.Chapitre 2 - Le Mystère Des Huit
| ||||||||||||||||||

| |||||||||
Stratégie wiki :
La bataille commence avec Dorammu seul, et souvent utilise son attaque lui donnant renforcé. Il fait appel à deux démons, qui ont le passif sombre contrôle s'ils sont atteints de l'effet vide obscur. Il faut donc lancer les vapeurs de Valtorr dès qu'ils apparaissent. Si les deux démons sont K.O. avant Dorammu, deux autres seront appelés. Il faut donc se focaliser sur le boss. Le costume de défenseur de Strange est très utile dans ce combat : Le poison mortel cause beaucoup de dégâts au boss et le bouclier déjà présent évite de perdre un tour ou de l'endurance pour mettre un bouclier protecteur. Il y a une part de chance dans ce combat, surtout si les démons se mettent à rugir, ce qui provoque peu de bénéfices chez eux, en plus de ne pas vous attaquer.
Stratégie forum :
Attaquez avec les Vapeurs de Valtorr afin que les démons se battent entre eux, puis se concentrer sur Dormammu
The battle begins with Dr. Strange and Dormammu both alone. Dormammu can use all of his attacks, often starting with Draw Power, gaining Modèle:EI-Strengthened Strengthened. He will summon two Sicuspcis Demons in a few turns, both with a passive debuff named Modèle:EI-Dark Control Dark Control: if afflicted by Modèle:EI-Dark Void Dark Void they'll attack each other, so using Vapors of Valtorr just after their appearance is the best thing to do.
If both Demons are knocked out before Dormammu, two more will be summoned, so it's best to focus attacks on Dormammu before attacking the Demons. Dr. Strange's Defender alternate uniform is very useful in this battle, as Modèle:EI-Bane Bane comes in handy when chipping away at Dormammu's health, or not having to use a turn or Stamina to bring up a shield on Dr. Strange.
There is a certain amount of luck required for this battle as the Demons tend to use Gluttonous Roar while under Dark Control, proving little to no assistance, other than not attacking at all.
| ||||||||||||||||||

| |||||||||
Stratégie wiki :
Dans ce combat, Bullseye a un passif permettant à Daredevil de prévoir l'attaque ennemie. Uiliser une action de Daredevil lui donne un buff spécial. Si bullseye utilise une action prédite par Daredevil, Ce dernier esquivera l'attaque et contre-attaque avec le coup de matraque. Attention aux jets de couteaux de bullseye (évités par L9 de Daredevil) qui mettent une cible qui rend toutes les attaques de Bullseye critique. La bataille sera très facile si vous avez l'iso-r de Daredevil, qui permet de faire une seconde attaque : les points de pression du coup de matraque vous permet ensuite de faire des L9 exploitant les faiblesses...
Stratégie forum :
Ici on trouve le principe du Pierre-Papier-Ciseaux, si on prédit l'attaque de Bullseye, on l'évite et contre attaque, sinon on la subit (Bulleyes ne rate jamais)
In this battle Bullseye has a unique passive debuff named Modèle:EI-Predictable Predictable, which allows Daredevil to predict and dodge his moves. Except for Radar Sense, using one of Daredevil's attack will grant him a special "buff":
- Using Billy Club grants Modèle:EI-Predict Kickoff Predict Kickoff
- Using Snap Kick grants Modèle:EI-Predict Knife Barrage Predict Knife Barrage
- Using Manrikigusari grants Modèle:EI-Predict Knife Throw Predict Knife Throw
If Bullseye uses the predicted move, Daredevil will Dodge it and counterattack with Billy Club. This battle could be a matter of luck, especially because Bullseye's Knife Throw causes Modèle:EI-Easy Target Easy Target, making all of his attacks critical hits.
This battle may be a bit easier if you bought the Fichier:Empowered Iso-8 Assailing.png Assailing Empowered Iso-8, which yields Daredevil a chance to follow-up attacks (since he would counter with Billy Club, which would apply Modèle:EI-Pressure Points Pressure Points and Modèle:EI-Internal Bleeding Internal Bleeding on Bullseye), thus your real focus should be using Daredevil's L9 which has Modèle:EI-Paragon Exploiter Paragon Exploiter each time Bullseye gets Debuff'd.
| ||||||||||||||||||

| ||||||||||||||||||||||||||||||||||||||||||||||||||||||||||
Stratégie wiki :
Ce combat sera plus facile si vous utilisez les classes de départ des héros. Faites bien attention à cela si vous utilisez des costumes. La première vague est contre deux cogneurs et un broyeur. Avec Cap, faites un lancer de bouclier, avec IM, essayez de faire un one-shot sur un ennemi ou un déluge de missile(avec l'armure Mk 42, faites le laser à haute énergie) et avec Thor, faites inspiration de bravoure puis frappe dynamisante sur le broyeur. N'utilisez rien d'autre que la L2 si Thor gagne un tour supplémentaire. La vague 1 est presque terminée, utilisez la garde au bouclier de cap, puis terminez la vague. La seconde vague est contre 3 exploseurs. Cela pose problème à thor (si vous l'avez laissé en cogneur) mais le fait d'avoir fait la garde au bouclier de cap au tour précédent, il protègera thor et gagnera un tour supplémentaire. Faites un lancer de bouclier, puis avec Thor lancez une foudre (2 puissances de mjöllnir+renforcé+ furieux) qui devrait tuer deux persos et bien abîmer le troisième. Il ne reste plus qu'à finir celui-là par IM ou Cap, suivant l'ordre des tours. La dernière vague, contre deux espions et un tacticien. Les deux espions ne feront pas grand mal à Cap et seront battus assez facilement. Utilisez la garde au bouclier s'ils ont déjà les réflexes de combat activé, ce qui permettra à Cap de faire des contre-attaque, du fait qu'ils ne sont pas encore furtifs. Thor et IM devraient être capable de les tuer sans se prendre de contre-attaque, sinon, prenez le risque de lancer un coup de bouclier de Cap pour augmenter les dégâts des deux autres. Utilisez le bouclier de IM, le tacticien s'acharnera sur lui. Si vous avez le costume Mk 42, faire l'unirayon brise-coeur qui empêchera le tacticien d'utiliser son bouclier, et donc permettra de la finir plus rapidement. Le combat peut prendre une toute autre allure si vous utilisez les costumes dans différentes classes.
Stratégie forum :
Il est préférable d'utiliser les classes originales des héros (si jamais vous utilisez des costumes) Gardez Mjollnir pour la troisieme vague, contentez vous d'accumuler
Faites en sorte que Captain America ai toujours la Garde au Bouclier activée (surtout pour la seconde vague
First Heroic Battle in the game that requires three heroes, this is a surprisingly easy fight when played strategically. This battle is best fought with the primary classes of each hero involved; if you insist of using alts, try to make sure ALL of your heroes are using alts to maintain the class diversity of the team, as it comes in handy during the battle.
The first round is against two Bruiser minions and a Scrapper. With Captain America, use Shield Throw. With Iron Man, try to take out one of the minions with a single target attack, or use Missile Barrage (if using Mk 42 alt, use High Energy Laser). With Thor, use Inspire Bravery, then Empowering Strike on the Scrapper. Do not use anything but Empowering Strike on the Scrapper if Thor gets another turn. When it seems like the wave is about to be vanquished, go ahead and use Shield Guard on Captain America, then end the round.
The second round is against two Blaster Minions and another Blaster. This puts Thor at risk (if he is a Bruiser), but by using Shield Guard during the previous wave, Captain America protects and gains a free turn (if he is a Tactician). Use Shield Throw, then when Thor's turn comes around, use Summon Thunder. With Strengthened, Enraged and two stacks of Modèle:EI-Might of Mjolnir Might of Mjolnir, this attack should knock out the minions and greatly damage the Blaster, who should still also have Modèle:EI-Lock-On Lock-On from Cap's Shield Throw. Finish him off with Iron Man or Cap, depending on the turn order.
The final round is against two Infiltrator minions and a Tactician. In this round, Captain America fairs better as a Bruiser than a Tactician; however, the minions can still be easily vanquished. Use Shield Guard if the minions have yet gained Combat Reflexes, as Cap can still counter once before they gain Combat Reflexes (Initial attack is not Stealthy yet), Iron Man & Thor should be able to finish the minions off, without getting a counter.
If not, consider using Cap's Shield Throw whose Modèle:EI-Lock-On Lock-On debuff increases the damage of all of Iron Man's attacks and Thor's Hammer Throw & Summon Thunder, do note the minions would counter. If you have 2xMoM, Summon Thunder would finish the minions similar to the wave earlier. Here is a good place to use Deflector Shield (if not using the Mk 42 alt, and using Iron Man as a Blaster), as the Tactician will focus his attention on Iron Man (as a Blaster), and spam Hatebeam. If using the Mk 42 alt, Heartbreaker Unibeam will prevent the Tactician from using Ideological Shield, allowing him to be finished more swiftly.
| ||||||||||||||||||

| ||||||||||||||
Stratégie wiki :
Dans ce combat, vous affronterez Deadpool et Bob, un généraliste qui protège Deadpool. Il sera régénéré 3 fois, la dernière fois il sera transformé en Armure de puissance de l'Hydra. Durant la phase où Bob est présent, Deadpool se contentera de redonner un peu de vie à lui ou Bob. Une fois que Bob est tué, il gagne le passif Noooooooo qui lui permettra d'attaquer Wolvie. Ce sera à vous de choisir ce que vous préférez faire entre empếcher la protection de Bob et tuer Deadpool, ou alors battre Bob puis Deadpool. Contentez-vous de recharger quand vous manquez d'endurance ou avez angoisse mentale (un iso-r donnant de la vie à ce moment là est conseillé!), sa régénération devrait le garder en vie un bon moment. Pour minimiser les nombres verts : L6, puis L1 avant L2. La grande difficulté sera si Bob vous immobilise trop souvent, auquel cas vous tomberez rapidement quand Deadpool attaquera.
Stratégie forum :
Deux options : Vous vous acharnez et faites saigner Bob jusqu'à ce qu'il meurt, puis vous vous occupez de deadpool
Ou vous mettez Acculé sur Bob et faites saigner Deadpool
In this Battle you will be facing Deadpool as a Scrapper and A new enemy called Bob as a generalist (despite the sprite is equal to an Hydra Infiltrator's one). This battle is unique because Bob will protect Deadpool and, if he dies he will be revived by Deadpool up to 3 times in which he will become into an HYDRA Power Armor; after that, Bob will no longer be resurrected. Note Deadpool would only gives a small heal to either him or Bob during this phase. After Bob dies, Deadpool will gain a passive called Modèle:EI-Nooooooooooooo! Nooooooooooooo! in which Deadpool will attack Wolverine. It is up to the player to use the advantage of Wolverine's Feral Ambush and Savage Rend attack to directly attack Deadpool or Wolverine can take out Bob before focusing on Deadpool. Proper Strategy and a bit of luck (Since Bob can deal Modèle:EI-Stun Stun to Wolverine using Stun Baton in normal mode or Hurl in Power Armor Mode) is needed to succeed in this Heroic Battle. Just recharge when you run out of stamina or is inflicted with Mental Anguish (The Recovering E-Iso8 could help). Wolverine's Healing Factor can keep him alive for a long time. If you focus on Bob, then Deadpool, use L6+L1 before using L2 to minimise stacks of Green Numbers! generated.
Note: If Wolverine is in a pinch (both HP and Stamina scarce), the Soothing EISO-8 (obtainable in his previous HB) would keep Wolverine prone for the battle. If Bob would Modèle:EI-Stun Stun Wolverine much often, he would be vulnerable in battle and fall pretty easily when Deadpool attacks him.
| ||||||||||||||||||

| |||||||||
Stratégie wiki :
Ce combat nécessite une bonne coïncidence de chance et de timing. Bien que Spidey soit espion, le bouffon vert ne peut pas être touché par des coups critiques, gagne des attaques multiples à chaque tour et a des chances d'immobiliser, ce qui lui donne un gros avantage. Notes qu'on ne peut pas contre-attaquer lorsqu'on est immobilisé. Essayez au maximum d'immobiliser le bouffon avec la balançoire, et dès que le bouffon est pris dans la toile, attaquez avec la fronde de toile (pas de coups critiques, mais de gros dégâts quand même. Boostez bien l'esquive de Spidey pour ce combat.
Stratégie forum :
Spiderman doit être espion Utilisez le Spider-Sense dès que disponible Utilisez la 4e attaque de spider pour assommer le Gobelin Utilisez la 3e attaque de spider
Finissez tranquillement le combat (n'oubliez pas de relancer le Spider-Sense)
This battle requires a great deal of luck and timing. Although Spiderman is an Infiltrator and Green Goblin is a Tactician, thereby enabling Spidey to counter every hit, Gobbie has three key advantages: 1. Gobbie cannot be critically hit, 2. Gobbie gets multiple attacks per turn after the first round and, most importantly, 3. Gobbie's Glider Smack has a chance to Modèle:EI-Stun Stun. As Stunned targets cannot counter, this renders Spidey's main advantage in this battle completely useless.
For those who do not wish to purchase the alt uniform or the Relentless Empowered Iso-8, time when you use Spidey-Sense so that Glider Smack's stun effect is immediately removed during the free turn; Gobbie tends to use Glider Smack as his first move during the third round, so save it until then, or stun him with Web Swing. If you are lucky enough to have the first turn in round one, use Spidey Sense for extra turns and Web Swing for the chance to Stun Gobbie, putting off his Goblin Serum multiple turns for an extra round as he always activate Goblin Serum 1st. If Goblin is Modèle:EI-Webbed Webbed and Web Swing is on cooldown, use Web Slingshot as much as you can because, even if it cannot crit due to the Modèle:EI-Imposing Visage Imposing Visage passive, it will deal a lot of damage. Stock up on Evasion-boosting Iso-8s and this battle shouldn't be too much trouble.
| ||||||||||||||||||

| |||||||||||||||||||
Stratégie wiki :
Dans ce combat, il va sans dire que Vif devra attaquer le tacticien et la sorcière le cogneur (sauf si vous avez le costume généraliste. Le bouclier du chaos vous permettra de régénérer et d'empêcher les brûlures. Utilisez les décharges magiques au tour 1 de la sorcière malgré le tacticien. Essayez de garder le maximum de « rapidités » sur vif. Une fois le tacticien et le cogneur K.O., l'exploseur ne présentera plus de problème.
Stratégie forum :
Utiliser la premiere attaque de la sorciere tout en accumulant les Rapidité de vif. 'utiliser Bouclier du Chaos qu'en cas de Brulure ou d'ImmobilisationThis Heroic Battle features the twins, Scarlet and Quicksilver. As two of the opponents in this battle are the counterclass of the heroes involved (unless Quicksilver is wearing his Generalist alt), the key to success is focusing attacks on the Tactician with Quicksilver and the Bruiser with Scarlet Witch, until both are knocked out. But watch out, because the Blaster Sentinel may cause Modèle:EI-Burning Burning and the Bruiser one may cause Modèle:EI-Stun Stun. Avoid using Chaos Shield until this happens, as this will grant your characters Modèle:EI-Regeneration Regeneration. Although it will grant the Tactician an extra turn, use Hex Spheres as your first move with Scarlet Witch. Try to keep as many stacks of Modèle:EI-Quickness Quickness on Quicksilver as possible, and focus Scarlet Witch's attention on the Bruiser from the second round onward. Once the Bruiser and Tactician have been taken down, the Blaster should present little challenge.
Chapitre 3 - Crise De Direction
| ||||||||||||||||||

| ||||||||||||||
Stratégie wiki :
Ce combat est plutôt difficile du fait de la faiblesse de Mr Fantastic, alors qu'il est face à deux ennemis costauds. Dr Fatalis commence le combat avant son fatalibot, et offre un tour bonus à Reed grâce au bonus tacticien. Attaquez alors Dr Fatalis avec le coup de poing élastique pour poser distraction (son gant magique peut être mortel sinon). Utilisez ensuite le bifurcateur sur le fatalibot pour qu'il attaque Dr Fatalis. Si le passif de Reed s'est placé sur Fatalis, faites la L6, sinon L2. N'oubliez pas de faire un coup de bifurcateur à chaque fois que c'est possible. Autre conseil : après la L6, Dr Fatalis applique une barrière mystique bloquant les attaques de groupe (donc la L6).
Stratégie forum :
Utilisez l'attaque 1 sur Fatalis puis l'attaque 4 sur le fatalibot Utilisez l'attaque 4 dès qu'elle est disponible Ensuite si Fatalis a "recentré", lancez l'attaque 2
Si Fatalis a "cible verouillée", lancez l'attaque 3 sauf si Fatalis a sa Barrière Mystique
This battle is moderately difficult, especially because Mr. Fantastic is a rather weak character and he's alone against two rather strong enemies. Dr. Doom will randomly act before his Doombot, attacking Reed and giving him an extra turn due to his Tactician class bonus (unless he's got his Infiltrator alt, highly un-recommended): attack Dr. Doom with Stretch Punch, dealing ![]()
![]() Distraction to him (his Magic Bolt could be lethal). Fantastic should then use Bifurcator on the Doombot, making him attack his master for a turn (the real Doom will then attack him with Modèle:EI-Ring Imperial Ring Imperial). When Dr. Doom gains Modèle:EI-Refocused Refocused, attack him with Reed's L2; if he gains Modèle:EI-Weak Point Weak Point instead due the Mr. Fantastic passive use his L6, but don't forget to use Bifurcator when is unlocked. Another hint: When Mr. Fantastic uses his L6 attack, the Blaster Doom activates Mystical Barrier on his next turn, which only blocks melee attacks (Meaning Mr. Fantastic's L6 is rendered useless for that round). Because Mr. Fantastic's L1 and L2 are Ranged, feel free to follow the steps mentioned earlier.
Distraction to him (his Magic Bolt could be lethal). Fantastic should then use Bifurcator on the Doombot, making him attack his master for a turn (the real Doom will then attack him with Modèle:EI-Ring Imperial Ring Imperial). When Dr. Doom gains Modèle:EI-Refocused Refocused, attack him with Reed's L2; if he gains Modèle:EI-Weak Point Weak Point instead due the Mr. Fantastic passive use his L6, but don't forget to use Bifurcator when is unlocked. Another hint: When Mr. Fantastic uses his L6 attack, the Blaster Doom activates Mystical Barrier on his next turn, which only blocks melee attacks (Meaning Mr. Fantastic's L6 is rendered useless for that round). Because Mr. Fantastic's L1 and L2 are Ranged, feel free to follow the steps mentioned earlier.
| ||||||||||||||||||

| |||||||||
Stratégie wiki :
Combat très facile pouvant être gagné avec Ms Marvel au lvl 9. Les attaques d'Opales sont faibles, le fait qu'elle soit tacticien ne pose donc pas de soucis. Utilisez seulement l'absorption d'énergie pour être régénéré par les attaques adverses puis les frappe Kree, rixe et explosion photonique. L'endurance ne pose pas de problème grâce au potentiel caché qui lui redonne de l'endurance grâce aux attaques énergétiques.
Stratégie forum :
Utilisez l'attaque 4 puis la 2 et enfin la 1 et la 3, puis répétezThis battle is very easy and can be won by any L9 Ms. Marvel. Moonstone is a Tactician, so she's got a class advantage against Ms. Marvel (unless you've bought her Bruiser alternate outfit), but all of her attacks aren't really powerful, and some of them are energy based. Just use Absorb Energy to get healed by Moonstone's energy attacks, use Kree Speed and attack her with both Brawl and Photon Blast, empowered by the Modèle:EI-Electromagnetic Energy Electromagnetic Energy and Modèle:EI-Kinetic Energy Kinetic Energy buffs. Stamina won't be a problem, since Ms. Marvel Modèle:EI-Hidden Potential Hidden Potential will make her regain stamina from energy attacks.
| ||||||||||||||||||

| |||||||||||||||||||
Stratégie wiki :
Ce combat est faisable avec le costume classique, mais le costume âge héroïque tacticien le rend beaucoup plus facile. Au début du tournoi, placez cible parfaite sur bowman. Ensuite, utilisez juste volée de flèches durant le reste du combat. N'oubliez pas de remettre cible parfaite sur Bowman dès qu'elle expire.
Stratégie forum :
Attaque 4 sur le boss puis Attaque 2 jusqu'à ce qu'il ne reste plus qu'un ennemi (refaire attaque 4 de temps en temps
This battle can be completed with the Classic Hawkeye outfit, but for this, the Tactician Heroic Age one will make the fight a lot easier.
Once the fight starts, the first thing you shall do is to use Modèle:EI-Pinpoint Target Pinpoint Target on Bowman. Next, just spam Arrow Volley during the rest of the fight. Don't forget to use Pinpoint Target on Bowman when/if it expires, which is crucial for the battle.
By using Pinpoint Target and then attacking with Arrow Volley, you will have the chance of having follow-up attacks on Bowman, making him take extra damage because of his passive debuff Modèle:EI-Pin Cushion Pin Cushion. In case you're using Heroic Age outfit, every time you hit an enemy with a fire or energy damage arrow, it will do extra damage on all your foes; using this with Arrow Volley will create a chain of extra damage, plus the chance of follow-ups on Bowman. This should easily defeat Bowman even before the other two Hydra agents, leaving you with two easy targets to defeat.
| ||||||||||||||||||

| ||||||||||||||
Stratégie wiki 1 :
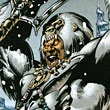
Équipement suggéré : e-iso : repos apaisant (recharger redonne de la vie). A-iso concentré sur la L2. ISO en santé/attaque/précision/esquive. Combat très aléatoire : Si Phoenix commence avant le hellfire, Selene n'utilisera pas son Skia Thanatou au premier tour (attaque pouvant tuer Phoenix dès le premier tour). Commencez par une explosion psychique sur le hellfire, puis une liaison mentale sur lui et rechargez. Selene le touchera alors et vous regagnerez de la vie. Au tour suivant, faites télékinésie sur Selene, elle a une bonne chance d'être immobilisée. Ensuite liaison mentale et recharge. Ensuite Télékinésie etc. Parfois, le Hellfire meurt en premier et vous vous retrouvez seul face à Selene. Pas de panique. Utilisez télékinésie-recharge. Vous esquiverez la plupart des attaques (en particulier Skia thanatou) et immobiliserez Selene dans 50-75 % des cas. Quand elle est à peu près à 5 % de vie, terminez-la à l'aide de l'explosion psychique. Rappelez vous que vous pouvez utiliser la liaison mentale pour retirer « Stare of the Abyss », même quand le Hellfire est mort.
Stratégie wiki 2:
Aucun équipement requis ici, il suffit juste de l'équiper en iso attaque/endurance. Le Hellfire ne faisant pas beaucoup de dégâts, les principaux viendront de Selene, mais le passif de Phoenix lui fait esquiver la plupart. Utilisez uniquement l'explosion psychique, c'est l'attaque la plus forte consommant le moins d'énergie. Utilisez occasionnellement la liaison mentale au moment de recharger. Tant que Selene n'utilise pas Skia thanatou, pas de soucis, sinon, priez pour que mort et renaissance s'active. N'utilisez JAMAIS la L9 ou télékinésie, ça consomme trop d'endurance et vous laissera vulnérable lors des recharges. L'idée ici c'est de s'occuper de Selene aussi vite que possible sans recharger plus d'une fois.
Stratégie forum :
Il vous faut équiper Phénix avec l'iso Renforcé En récupération, qui redonne de la vie quand on Recharge Utiliser Attaque Psychique sur le sbire, puis lien mental et Recharge Utiliser Télékinésie sur Selene puis Lien Mental puis Recharge puis Télékinésie... Si le sbire meurt, utiliser Télékinésie puis Recharge puis Télékinésie puis Recharge...
Le lien mental enlève la vision abyssale si on l'applique sur Selene quand le sbire meurt.
Equip Phoenix with:
EISO: Recovering Empowered ISO-8. AISO: Focused Ballistic on L2 (Telekinesis) ISO her with Health/Attack/Accuracy/Evasion (E.g. 2x Reactive Athletic, 2x Reactive Skillful, 1x Reactive Steady).
Phoenix's turn comes randomly before or after the Hellfire Heavy: when her turn is before him Selene won't use Skia Thanatou move in the first turn. Selene's Skia Thanatou attack is a move who inflicts Modèle:EI-Stare of the Abyss Stare of the Abyss and could kill Phoenix on her first turn. Or maybe not. For first, you start the battle with Psi-blast on Hellfire Heavy, next turn use Modèle:EI-Mind Link Mind Link to him and Recharge. Selene will hit the Heavy and you regain HP. New turn. Use Telekinesis on Selene... she has a good chance of being stunned. Next, again Mind Link and Recharge. Next Telekinesis etc...
Sometimes, Hellfire Heavy dies first, and you have a 1-vs-1 with Selene. Don't panic. A good idea is Telekinesis-Recharge. You evade most attacks (expecially Skia Thanatou) and stun the Black Queen 50-75% of the time. When she's down to 5% health finish her with Psi-blast. Also, remember this: you can use Mind Link for remove Stare of the Abyss. Even on Selene if the Hellfire Heavy is dead.
If you have Phoenix at level 13, try her with basic uniform, with the Surprising Empowered ISO-8 for the Sympathetic Empowered ISO-8.
Alternative Strategy: No Empowered Iso-8 or Alternate Uniform needed. Simply equip her with Relentless ISO to boost her Attack and Stamina. Since the Hellfire Heavy with Migraine does minimum damage, the main damage you take will be from Selene, where most of her attacks can be avoided by Phoenix's passive. Just keep using Psi-blast. It's the highest-damage attack with the least Stamina consumption. Only pause occasionally to Mind Link the heavy or to recharge. As long as Selene does not use Skia Thanatou, you'll be alright. If she does, just pray that Death and Rebirth procs. DO NOT use Phoenix Fire(L9) even when unlocked. It consumes too much Stamina and would leave her vulnerable when she has to recharge. In addition, don't use Telekinesis to stun Selene. The damage isn't high enough to compensate for the stamina consumption. The key here is to take care of Selene as fast as you can without recharging more than once
| ||||||||||||||||||

| ||||||||||||||||||||||||||||||
Stratégie wiki :
La clé ici c'est de réussir à bien gérer les contre-attaques. Cela vous permettra de gérer les ennemis gavés de vie et d'attaques multiples.Les contre-attaques de la veuves sont un passif dans le costume gris tacticien de la veuve. Essayez de garder le combo et la marque de revenge sur l'ennemi pour agmenter l'attaque L2 de la panthère. Les contre-attaques de la guêpe sont déterminées par les débuff d'opportunités actifs sur l'ennemi. Elle fait des plus gros dégâts sur les cibles touchées par le vibranium de la panthère. Les contre-attaques (et attaques suivies) de la panthère nécessite des actions, mais font vraiment beaucoup plus de dégâts. Sa L9 est très efficace, la L2 est radicale contre les cibles marquées par la veuve, sa L1 marche très bien contre les ultrons. Si possible, utilisez la posture de la panthère au début de la vague 2. Gardez le plus possible le buff « vif » sur la guêpe et détérioré sur les ultrons. Attention, la L2 de la guêpe, n'inflige pas distraction, bien que ça inflige de grand dégâts à la cible.
Stratégie forum :
Gardez Vif sur La Guepe, Affaibli et Faible face au Vibranium sur les ennemis
Appliquez les effets néfastes de La Guepe sur les UltronsThe key in this battle is to manage counter-attacks effectively. Each of your characters has a unique counter-attack that will allow you to deal with the enemy's high health and more numerous attacks. Widow's counter is passive in her Grey Suit Tactician Alt, giving you little control, but tends to leave Modèle:EI-Combo Setup Combo Setup and Modèle:EI-Marked for Revenge Marked for Revenge on enemies making excellent targets for Panther's Wakandan Arts. Wasp's counter requires opportunity debuffs (Modèle:EI-Staggered Staggered, Modèle:EI-Impaired Impaired, Modèle:EI-Off-balance Off-balance, Modèle:EI-Cornered Cornered, Modèle:EI-Winded Winded, or Modèle:EI-Neutralized Neutralized) active on their targets and does extra damage against Ultrons that have been hit by one of Panther's Vibranium attacks (L1 or L9). Panther's counter (and follow-up) requires some setup but will ultimately deal the most damage. His L9 is especially good at dealing with melee resistant Ultrons, his L2 does excellent damage against Widow's leftovers, and his L1 works well against range resistant Ultrons. If possible use Panther Stance at the beginning of the second wave to gain both counters and follow-ups for as long as possible. Keep Modèle:EI-Nimble Nimble on Wasp and Modèle:EI-Weakened Weakened on the Ultrons that act earliest while focusing down the one that acts last with Panther. Note that currently Wasp's L2 does not inflict Distraction, though it can be highly damaging.
| ||||||||||||||||||

| ||||||||||||||||||||||||||||||
Stratégie wiki :
Méthode rapide mais coûteuse : (119 CP) costume noir de spidey en cogneur, et costume broyeur pour chatte noire. Il suffit alors d'attaquer sans problème. Méthode avec les costumes par défaut : ISO augmentant l'esquive et l'attaque pour la chatte noire et santé/attaque/esquive pour Spidey. Mettez-lui également l'iso repos apaisant. C'est la clé de la victoire. Dans la première vague, attaquez un assassin avec griffure, et finissez-le au tour suivant avec chance à répétition puis prise paralysante. Ayez toujours spider sense activé et gardez spidey en vie avec recharge (seule action à faire même pendant les tours supplémentaires) Vous pouvez éventuellement utiliser sa balançoire pour immobiliser les assassins. La seconde vague est plus simple surtout que vous y arrivez avec les contre-attaque. Utilisez la même méthode que précédemment, avec éventuellement une fronde de toile quand votre ennemi est pris dans la toile d'une contre-attaque. Avec cette tactique vous y arriverez assez facilement, mais avec patience.
Stratégie forum :
Le plus simple est de mettre Spiderman en broyeur et Chatte Noire en bagarreur, le combat se passe sans probleme
Sinon Utiliser Black Cat pour saigner les ennemis et Spider Man pour les assomer (toujours avoir Spider-Sense activé)
The easiest way to nail this one is by equipping Bruiser Black Suit Spider-Man and Scrapper Claws Black Cat. From there, fairly straightforward. Black Cat has no problem hitting Maggia Assassin in melee and Spider-Man shooting his targets. Round two is easier with Black Cat having two attacks from buffed up round one and Spider-Man gaining Modèle:EI-Enraged Enraged on Maggia Bodyguard. This however requires additional 119 ![]() .
.
Chapitre 4 - À Travers Le Monde
| ||||||||||||||||||

| |||||||||
| ||||||||||||||||||
| |||||||||
| ||||||||||||||||||

| |||||||||
| ||||||||||||||||||

| |||||||||
| ||||||||||||||||||

| |||||||||
| ||||||||||||||||||
| |||||||||
Chapitre 5 - Thérapies Ciblées
| ||||||||||||||||||

| |||||||||
| ||||||||||||||||||

| |||||||||
| ||||||||||||||||||

| |||||||||
| ||||||||||||||||||

| |||||||||
| ||||||||||||||||||

| |||||||||
| ||||||||||||||||||

| |||||||||
Chapitre 6 - L'Opportunité Se Présente...
| ||||||||||||||||||

| |||||||||
| ||||||||||||||||||

| |||||||||
| ||||||||||||||||||

| |||||||||
| ||||||||||||||||||

| |||||||||
| ||||||||||||||||||

| |||||||||
| ||||||||||||||||||

| |||||||||
Chapitre 7 - Le Creux De La Vague
| ||||||||||||||||||

| |||||||||
| ||||||||||||||||||

| |||||||||
| ||||||||||||||||||

| |||||||||
| ||||||||||||||||||

| |||||||||
| ||||||||||||||||||

| |||||||||
| ||||||||||||||||||

| |||||||||
Chapitre 8 - L’Épreuve Du Feu
| ||||||||||||||||||

| |||||||||
| ||||||||||||||||||

| |||||||||
| ||||||||||||||||||

| |||||||||
| ||||||||||||||||||

| |||||||||
| ||||||||||||||||||

| |||||||||
| ||||||||||||||||||

| |||||||||
Chapitre 9 - Les Présages De La Fin
| ||||||||||||||||||

| |||||||||
| ||||||||||||||||||

| |||||||||
| ||||||||||||||||||

| |||||||||
| ||||||||||||||||||

| |||||||||
| ||||||||||||||||||

| |||||||||
| ||||||||||||||||||

| |||||||||
Galerie[]


Notes[]
- The Map Icon for Heroic Battles was first teased at the Official Playdom Forums on June 19, 2013.
- Heroic Battles were then previewed on a teaser trailer for Season 2 on the Marvel Video Games Panel at San Diego Comic Con 2013 on July 20, 2013.
- Heroic Battles were further explained at the Official Playdom Forums on July 27, 2013 as part of the Producer's Notes on Season 2.
- Heroic Battles were released on July 31, 2013.
- While a screenshot of Deadpool attacking Vector is present in the Producer's Notes for Season 2 about Heroic Battles, this is impossible to replicate in the game.
- A Bug after the release of Heroic Battles and Incursions occurred where each Heroic Battle and Incursion will give out Gold after a successful fight. This was fixed later on.
Voir Aussi[]
- Incursion